Epi Info™ User Guide
Form Designer
How To: Use the Relate Field
Related forms are relationships between the main or parent form with sub or child forms. They are used to establish a one-to-one or one-to-many relationship between parent form records and child form records. For example, a survey may have a form devoted to patient information. This may be related to a form to record the many hospital visits that each patient may have. Related forms are linked to a parent form automatically by unique keys generated by Epi Info™ 7. In Enter, the related form is opened by clicking a Related Form Button. When a Related Form Button is selected, it will open the first page of the related form. Using Check Code, the Relate Button can be made conditionally accessible (e.g. to show a special form for a particular disease). This field type is not supported on Web Survey or on the Companion for Android application. The following figure is an example of how a Relate field appears in Enter (circled in blue) based on the Surveillance form of the Sample project.

To add a Relate field:
- Open the Relate Field Definition dialog box.
- Enter the Question or Prompt. The text entered in this field will display on the canvas and prompt the user to enter a response.
- Click in the Field Name text box or press the tab key. Epi Info automatically suggests a field name based on the Question or Prompt, however, it is very important that field names be short, intuitive, and usable. The field name is used for data validation in Check Code and when doing analyses. Field names cannot start with a number or contain any spaces or non-alphanumeric characters (except the underscore character “_” is permitted).
Note: It is best to simplify the field name at this time. Field names cannot be changed after data collection starts.
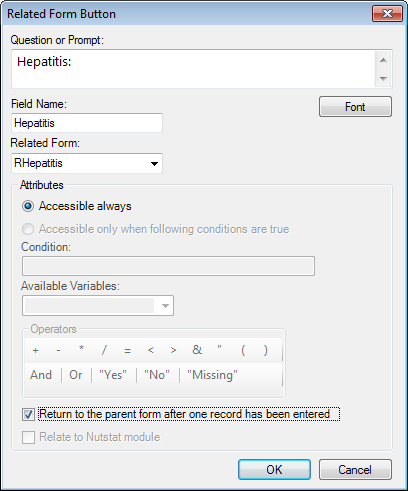
- From the Related Form drop-down list, select Create new form to create a new form or select an existing form.
- The dialog box will show the Accessible always button selected. This option cannot be modified. The Accessible only when following conditions are true selection is not available in this version of Epi Info™ 7.
- Accessible always will create a related button in the form that is active at all times during data entry.
- Accessible only when following conditions are true will be available in a future Epi Info™ release. However, a conditional statement can be created using Check Code (see Check Code). Check Code can be associated with the button to create a condition statement.
- Select Return to the parent form after one record has been entered to allow only one record to be entered in the related form for each record in the parent form. In Enter, after a record is saved in the related form, you are returned to the parent form. If multiple entries are desired, then leave this option unselected.
- Click OK. The Relate button field appears on the canvas.