Epi Info™ User Guide
Form Designer
How To: Use the Codes Field
A Codes field designates the available options on a form based on the user’s response to a question. Based on the value selected from a drop-down list, another field or other fields are populated with predetermined values. At least two fields must exist; one which holds the selection code, and another to receive the value of the code. The first field holds the selection code in a drop-down list while subsequent fields are Read Only and are populated based on the values in the codes table. The Codes field allows for more efficient and consistent data entry. This field type is supported in the Epi Info Web Survey and Cloud Data Capture environments, but all field names must match exactly and letters in field and column names must be in all lower case. The following figure provides an example of how a Codes field appears in Enter (circled in blue) based on the Surveillance form of the Sample project. The “Disease Code” field is automatically completed upon selecting the “Disease” from the drop-down list.

Create a New Codes Table
- Open the Codes Field Definition dialog box.
- Enter the Question or Prompt. The text entered in this field will display on the canvas and prompt the user to enter a response.
- Click in the Field Name text box or press the tab key. Epi Info automatically suggests a field name based on the Question or Prompt, however, it is very important that field names be short, intuitive, and usable. The field name is used for data validation in Check Code and when doing analyses. Field names cannot start with a number or contain any spaces or non-alphanumeric characters (except the underscore character “_” is permitted).
Note: To work with the Epi Info Web Survey or Cloud Data Capture environments, field names must be all lower case. - Select the field(s) to be linked from the Select field(s) to be linked section. To select multiple fields, hold down the CTRL key and click each field.
Note: It is best to simplify the field name at this time. Field names cannot be changed after data collection starts.
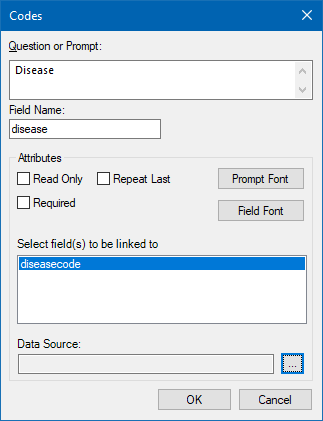
- Click on the Data Source browse button.
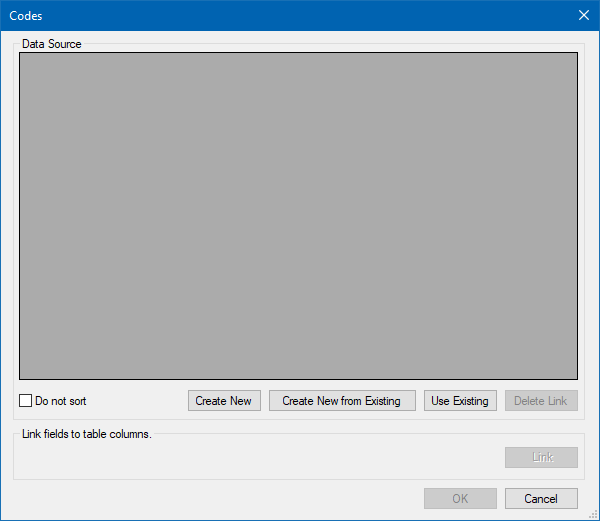
- Click Create New. A spreadsheet opens for you to enter the values for the Codes field and Linked fields..
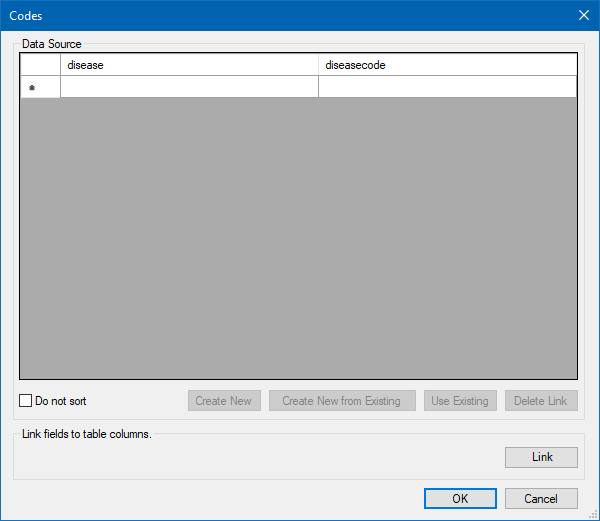
- The left-most column displays the selection field(s) chosen in the Fields Definition dialog box.
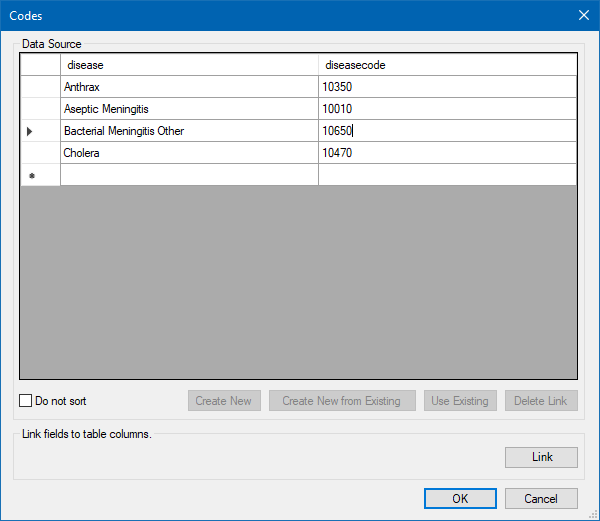
- Each column to the right lists the field(s) to receive the codes based on the value of the selection field.
- Enter the codes for each field.
- Press the Tab key to move to the next field, or to the next row if at the end of a row.
- Click OK to accept the codes for each field.
- Existing tables can also be used to create code tables.
- Click Create New from Existing (takes a copy of the selected table, changes to the original table will not affect the new table) or Use Existing (establishes a connection between the selected table and the new table, any changes made to the original table will modify the new table)
- Select a table from the drop-down list.
- Click OK.
For information on other attributes that may be available, see the topic on Field Attributes.
- Click OK to close the Field Definition dialog box and place the fields in the form.
- To test the code table, open the Enter tool and verify that both fields populate based on the drop-down list selection.
Create Cascading Drop-Down Fields
Cascading Drop-Down fields are two or more Codes, Legal Value, or Comment Legal fields linked together in such a way as to filter each subsequent field based on the value selected in prior fields. In the example described below, the drop-down field for State, filters the drop-down field for County so the County field only shows those counties that exist in the selected State. When the County is selected, the drop-down field for Hospital is filtered so only the hospitals located in the selected county are offered.
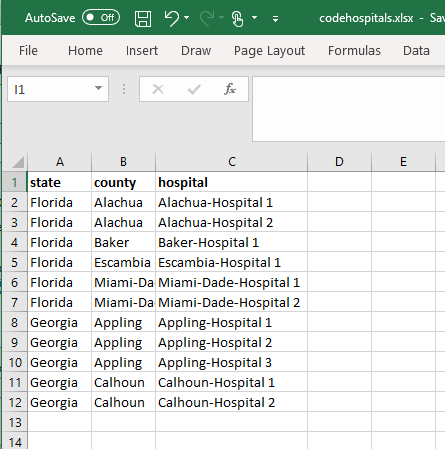
In order to create Cascading Drop-Down fields, you need to have a table completed with all values for the linked fields. This table can be imported into Epi Info™ 7 using Classic Analysis. The Excel spreadsheet shown below, named “codehospitals”, is an example of such a table. When importing this table into your Epi Info™ 7 project, the table name must contain the prefix “code”, as in this example, “codehospitals”.
To add Cascading Drop-Down fields, complete the following steps:
- Add the first Codes field to the page, but don’t link the field to other fields, yet. You will do this in later steps. For this example, we named the field “state”.
Note: For Cascading Drop-Down Fields to work in Epi Info Web Survey or Cloud Data Capture, it is important that the field names be all lower case and match the name of the column in the codes table. In this example, since the name of the first column in the codes table is “state” (shown in the Excel spreadsheet above), then the field name for this Codes field must also be “state” so that it exactly matches the spelling and letter case of the corresponding column in the codes table.
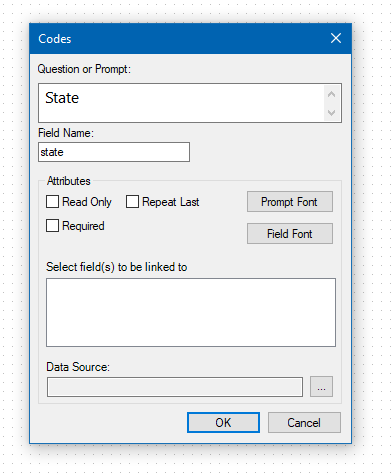
- Add another Codes field to the page. Again, don’t link the field to other fields, yet. In this example, we named the second field “county” to correspond to the “county” column in the codes table. Note that the field name and column name match spelling exactly and are all lower case. Repeat this step for all but the last field in your cascading sequence. In this example, we have only three fields to link, so the next field will be our last.
- Add the last field in our cascading drop-down sequence. The last field does not need to be a Codes field. It could be a Legal Value or Comment Legal field. In our example, we have two Codes fields named “state” and “county”, and one Legal Value field named “hospital”.
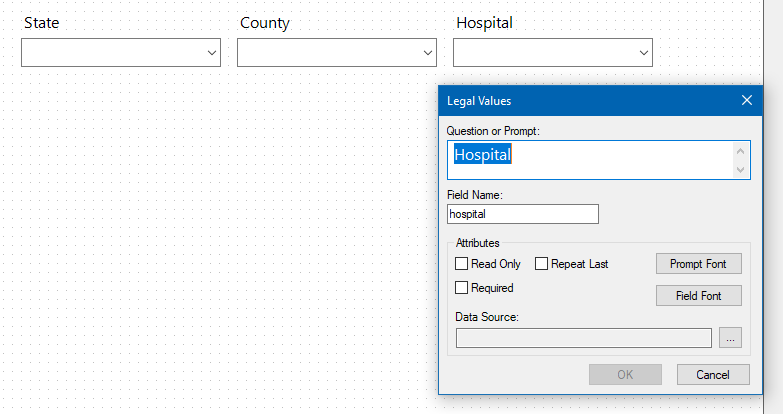
- If using a Legal Value or Comment Legal field for the last field, click the browse button to the right of Data Source. The Set Up Code / Legal Links dialog opens.
- Click Use Existing. The Open Form – Select a Table dialog box opens.
- Select the code table that was imported and click OK. In this example, we selected the table named “codehospitals”.
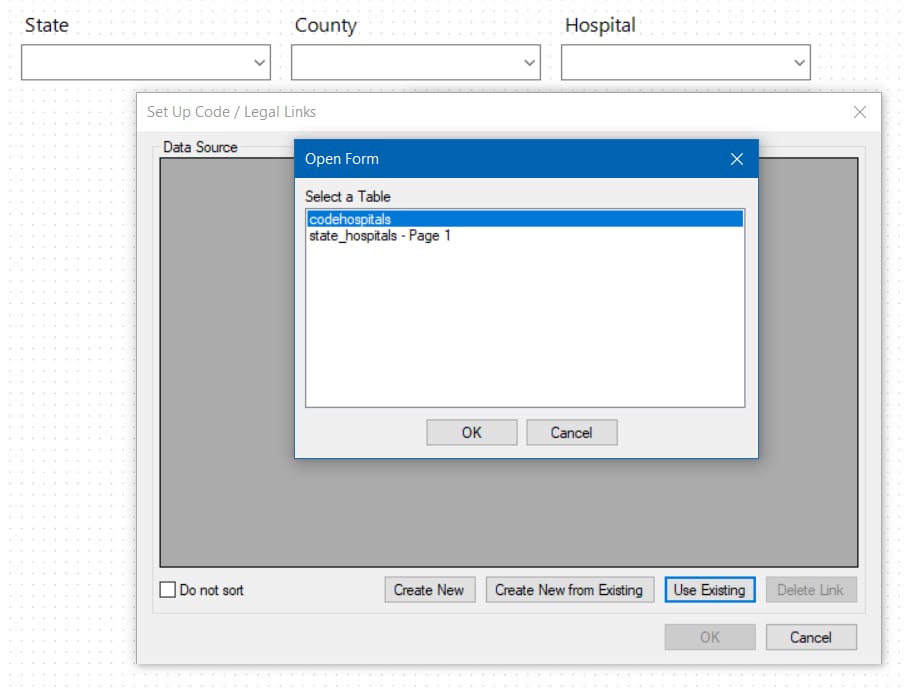
- Click OK. The Select a field dialog opens showing the columns in the “codehospitals” table that can be linked.
- Select the appropriate field. In our example, because we are linking the “hospital” field, we selected “hospital”.
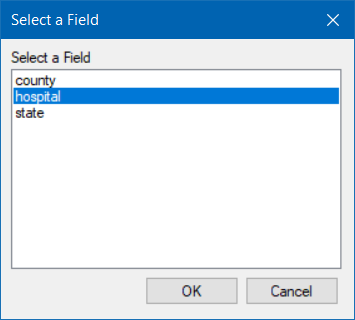
- Click OK on the Select a Field dialog. The Set Up Code / Legal Links data source table shows the values from the “hospital” column in table.
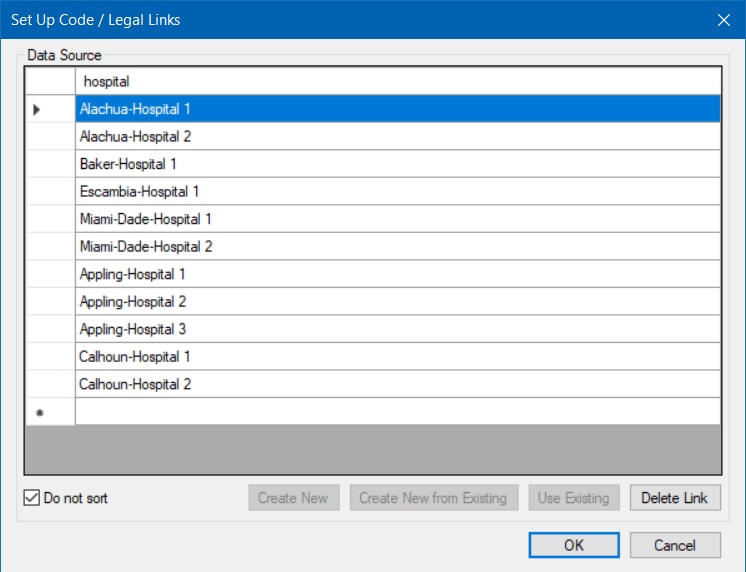
- Click OK on the Set Up Code / Legal Links dialog box.
- Click OK on the field definition dialog. The next steps are to link the fields to the remaining Codes fields.
- Open the properties for the first Codes field added above. (Right click the field and select Properties.) Our first field was “state” and we want to link this field to the “county” field so when “state” is selected, only the corresponding counties are shown in the “county” drop-down field.
- In the Select Fields to be Linked box, select the field you want to be filtered. Since, in our example, we want the “county” field to be filtered based on the selection made for “state”, we should select “county” here.
- Click the Browse button to the right of Data Source. The Codes dialog opens.
- Click Use Existing. The Select a Table dialog box opens.
- Select the same codes table used to link the last field. In our example, “codehospitals” is the codes table we are using.
- Click Link. The Match Fields dialog box opens. This is where we match the fields in our cascading sequence to the columns in the codes table.
- Select the column to be linked to the first Codes field. Since our first field is State, we selected State.
- In the Link Associated Fields group, select the Form Field to be linked. For our example we want County to be linked to State, so we selected County.
- In the Table Fields drop-down, select the corresponding column in the code table.
- Click Link. The association to the linked field appears in the Linked Fields box.
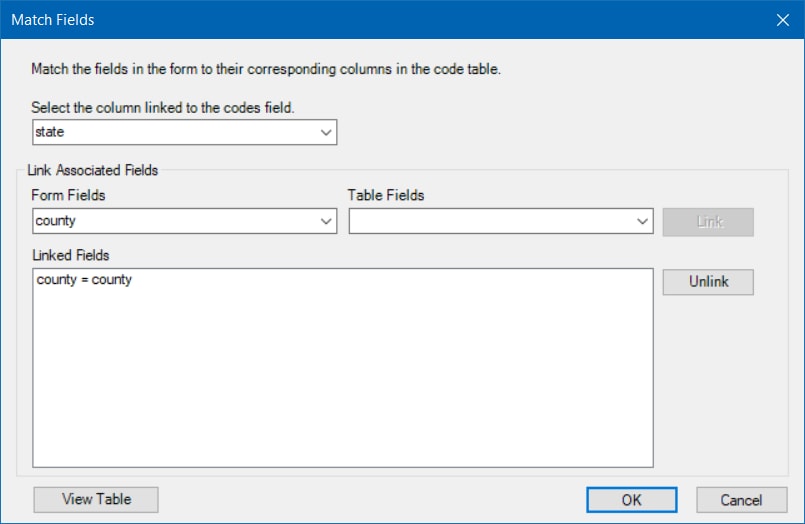
- Click OK to close the Match Fields dialog.
- Repeat the steps 12 through 22 for each remaining Codes fields in the cascading drop-down sequence. For each, specify the next field in the cascading sequence and link it to the corresponding field in the codes table. In our example, “county” is the only remaining Codes field to be linked and this field will be linked to “hospital”.
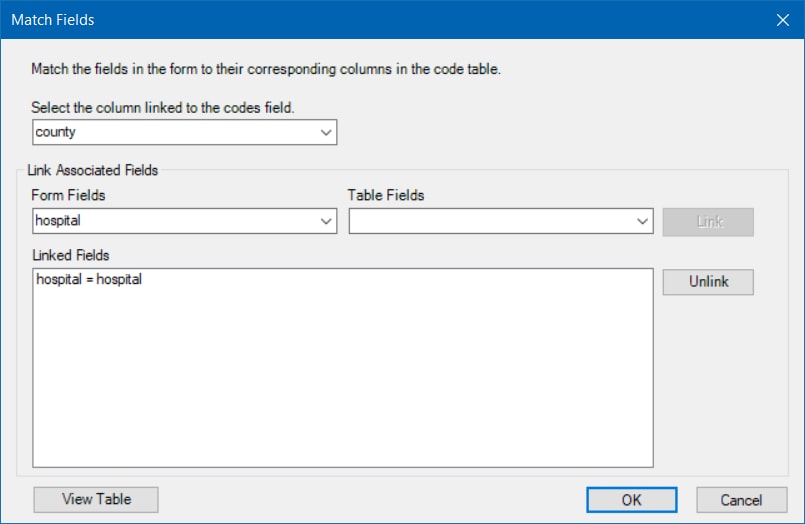
This completes the process to create a series of cascading drop-down fields. When the form is opened in Enter, the selection made in the first field in the cascading drop-down sequence will filter the values shown in the next field in the sequence. In our example, when Florida is selected for State Name, the list shown for County only includes the values Alchua, Baker, Escambia, and Miami-Dade which are Florida counties.

The “state” codes field filters the “county” codes field because of they way they are linked. Therefore, since Alchua, Baker, Escambia, and Miami-Dade are the only counties on the same row with Florida in the “codehospitals” table, those are the only counties that appear in the “county” drop-down field.

Likewise, when Alchua county is selected, only the values Alchua-Hospital1 and Alchua-Hospital2 are shown in the “hospital” legal values field.