Epi Info™ User Guide
Form Designer
How To: Make Form from Data Table
The Make Form from Data Table feature allows you to automatically generate an Epi Info™ 7 form based on an existing database file. Once completed, you will have the initial structure of a form that could be modified further if needed. Field types, code reference tables and field prompts can be specified during the process. Formats supported include MS Excel, MS Access, Flat ASCII, SQL Server and MySQL among other types.
For example, let’s say that you have an Excel spreadsheet with data that you have historically maintained using MS Excel but would like to create an Epi Info project to collect the data and enjoy the benefits that can be obtained from entering data using Epi Info 7. This feature allows users to do so.
The first step will require you to create an Epi Info™ 7 project. When prompted for a Form Name, assign any name to the form. The form will eventually be deleted once the import process from the MS Excel file is completed.
- From the Epi Info main menu, select Utilities > Make Form from Data Table. The Make Form from Table dialog opens.
- Select the desired Database Type. In this example, we will select Microsoft MS Excel 97-2003 Workbook.
- Navigate to the location of the file.
- Click on the name of the spreadsheet that contains the dataset you would like to import into Epi Info™ 7.
- Specify a form name.

- Click OK. The Table-to-Form dialog opens.
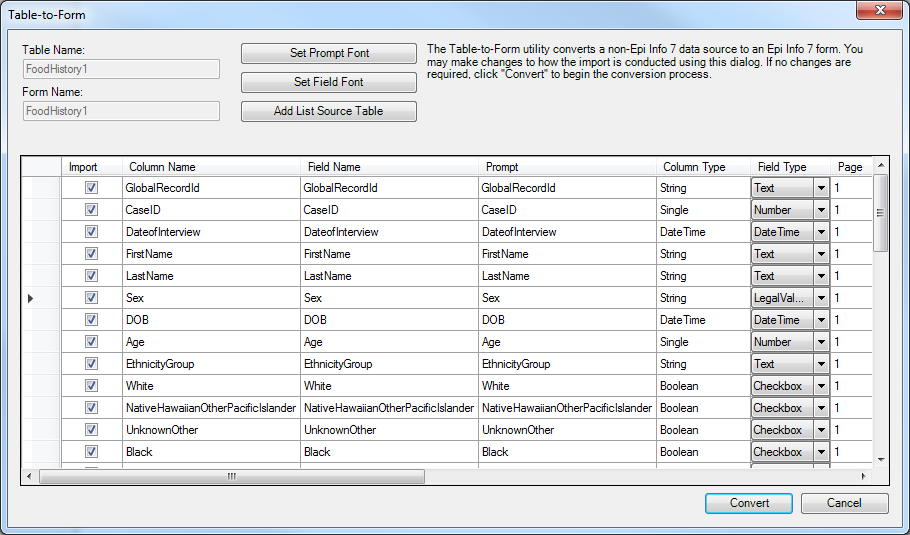
A series of columns are displayed.
- Click Set Prompt Font and Set Field Font to set the fonts for the question/prompts and the input fields, respectively.
- If any of the columns in the source table are to become a Legal Value field type, then click Add List Source Table and browse for the table that contains the list of valid values. This will be needed below for the ListSourceTableName column.
Here is a description of each column:
- Import– This check box allows you to select which fields should be imported into the form and turn off the import for other fields.. By default, all fields are checked.
- Column Name– This specifies the column name from the source table. The column name is initially used for the field name and prompt.
- Field Name– The field name is initially the same as the column name, but you can change it now here, or later by visiting the properties for the field after the form is created. If the field name is an Epi Info reserved word, the Table-to-Form process will change it automatically by adding a suffix of “_RW”. You may want to change this name to something more relavent.
- Prompt– The prompt is initially the same as the field name. You can change it now here, or later by visiting the properties for the field.
- Column Type– This is the type of data that Epi Info™ 7 detected.
- Field Type– This specifies the type of field that probably corresponds to the Column Type. For example, if Epi Info™ 7 detects string data for the column type, then it will suggest the type of field to hold this data might be a Text field. You can override this decision if you know what the data repesent. For example, if the column contains only “Yes” and “No” values, Epi Info™ may suggest the Text field, but you may decide the YesNo field type is more appropriate.
- Page– For tables having many columns, Epi Info™ will place the fields on the form based on the order they appear on the source table. It will stack as many fields as will fit on the first page, then it will continue to add pages and stacking fields as needed to accommodate the all of the columns. You can use the Page column to instruct Epi Info™ to keep certain fields together on a specific page.
Note: There is a limit of about 250 fields on any given page. - Tab– This specifies the order of the field within the page during data entry.Tab stop- If data entry will occur for a field, then this should remain checked. Some fields are automatically calculated, so these would not need a Tab stop and therefore the Tab stop checkbox should be unchecked. When Tab Stop is unchecked, the cursor will not move into the field during data entry.
- Read only– This check box sets the Read Only attribute of the field. If checked, the field will be disabled. By default, it is unchecked.
- Required– Fields where data entry is manditory should have this Required attribute checked. By default, it is unchecked.
- Repeat last– When checked, the Repeat Last attribute causes the value of the most recently viewed record to become the pre-populated values when a new record is created. By default, it is unchecked.
- Range– Allows for a specified value between one value and another. During data entry, if you attempt to enter a value outside the specified range, you’ll get a warning message that the value is out of range. Missing values are accepted. By default, it is unchecked. If you check the Range check box, then also specify the Lower and Upper ranges as described below.
- Lower– Specify the smallest or lowest value that can be entered into the field.
- Upper– Specify the largest or highest value that can be accepted by the field.
- List Source Table Name– If a reference table has been imported using the Add List Source Table option, the field can be linked to one of the imported tables. This only applies to Legal Value fields.
- List Source Text Column Name– If more than one column is available on the reference table imported, specify which column name should be used to map to the field from within the table.
- List Source Table– Fields can be removed from the View Fields list using the back single arrow or back double arrows.
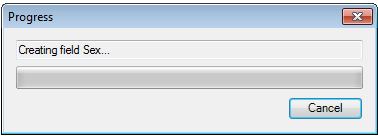
- Click Convert to start the import process.
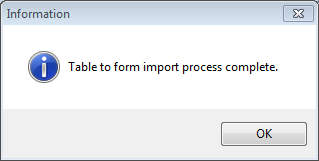
The process of creating the form and importing the process begins. Once the process is completed, the message “Table to form import process complete” message appears.
After the import process has been completed, you can make some changes to the form such as alignment, font, and adding labels and titles. However, do not cut and paste fields from one page to another. If you intend to move fields across pages after the import, we strongly recommended that you first Delete Data Tables Without Deleting the Form, move the fields to the necessary pages, then Use the MERGE Command in Classic Analysis to merge the data into the revised form.