Epi Info™ User Guide
Form Designer
How To: Create a New Blank Project and Form
Every Epi Info™ 7 project could contain two files; the database file and a project file (.prj) that is contained in a project folder. The project file holds the information about the location and format of the database, and whatever connection information might be required, such as a user name and password. If you choose to use the Microsoft Access format for your database, your project may also have the database file (.mdb) inside the project folder. The database file can also be saved to another location as needed. Projects that use a SQL Server database will only have the .prj file since the database is located on the server.
To create a new project and form, follow the steps below:
- From the Epi Info main menu, select Create Forms or select Tools > Create Forms from the toolbar. The Form Designer window opens.
- Click the New Project button in the toolbar or select File > New Project. The New Project window opens.
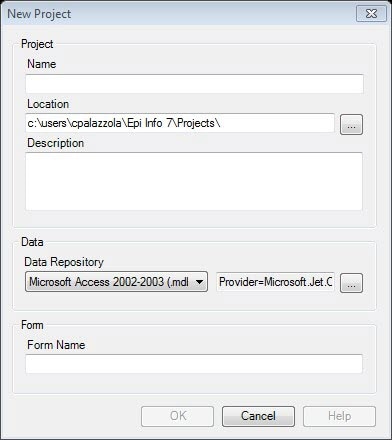
- Enter a Project Name. Project names cannot contain spaces, or most non-alphanumeric characters, although underscores are permitted.
- Set the desired project location by typing it into the Location field, or clicking the browse button. The default location for projects is the Epi Info 7Projects folder.
- Provide a description of the project. (Optional)
- Select the database format from the Data Repository drop-down list. The default option is Microsoft Access 2000-2003. However, SQL Server is also available. To use the SQL Server option, you need to have access to a SQL Server database.
- If you selected Microsoft SQL Server for the Data Repository, then click the browse button to the right to enter the connection information for the SQL Server database. Contact your SQL Server database administrator for the required information requested in this dialog box.

- Click OK.
- Tab to, or select the Form Name field.
- Enter a Form Name.
- Use only letters and numbers.
- Do not start a form name with a number.
- Do not use any spaces.
- Click OK. A new blank canvas appears with the new form name and page on the tab at the top left of the canvas.