Event Calendar
Building in the WCMS
Setting up the Calendar
Create a page to hold the calendar. Then, using Visual Composer, insert a CDC event calendar. There are no properties to set for this content element. By default, the calendar will automatically pull LINK-published events from across the site, but in the Settings pop-up, you can select the events to pull by category. (See Event Categories below.)
Once you have one or more events published to LINK, publish the calendar page to LINK.
Note regarding calendar viewing: Only LINK-published events show up in any environment, including preview, DEV, and LINK.
Creating an Event
- Optional: Upload an image for the event to the WCMS. (Recommended aspect ratio is 4:3 with a minimum size of 400×300.) Don’t forget to include alt text.
- From the content browser, use the “New Content” option to add an “Event (ICS File).”
- In the event form, complete the event details.
- Save with ICS file extension.
- Click Preview (to right of Save button) to see how event details will look.
- Fix issues and resave.
- Publish the event to DEV and LINK. Once the event is published to LINK, it is displayed in the event calendar (assuming the calendar has been LINK-published).
Event Categories
You can create a series of “categories” that can be applied to each event, which gives users the ability to filter on set Event Categories. To edit / create new Event Categories:
- Click on Manage Taxonomies in the left navigation.
- Click on Event Categories in the displayed taxonomies.
- From this page, you can add new Event Categories and edit existing Event Categories.
Note: Event Categories are hierarchical, so categories can have “child” categories, and will display as such any Event Calendar navigation.
To apply an Event Category to an event:
- Create or edit an Event (ICS) content type.
- Scroll down to Events Calendar options, and the last option is Event Category, where you can check one or more existing Event Categories.
- Save and when ready, publish the Event to Link.
Multiple Calendars
Using Event Categories, you can create multiple calendar modules on a site. By default, a calendar displays all Events published on the site. If you’ve created Event Categories, have applied them to Events, and have published these events, you can select which Event Category to filter on. This way, you can display a subset of events in each Calendar module.
- Open the page on you wish to insert an Event Calendar.
- Add a CDC Event Calendar module to the page.
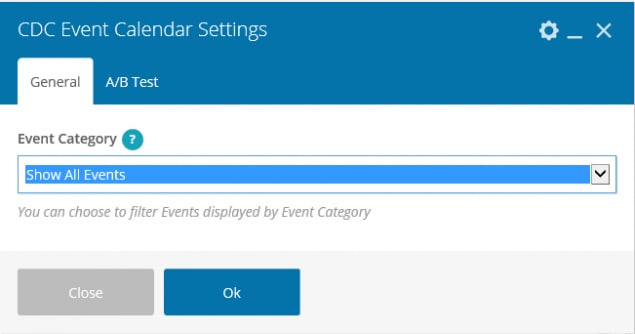
- By default, the module is added with default options. Click on module to edit, and if you have published Events with Event Categories selected, you’ll see the option to filter on a specific Event Category:

Use the dropdown to select which Event Category you want filtered on in this this calendar, or select “Show All Events” to display all events on the site (default option).
The event calendar is a single-use Visual Composer module.
To create a new event, use the “New Content” option in the WCMS content browser and select “Image (ICS File)” as the content type.
Save each event with an “ICS” extension.
By default, an event calendar pulls all LINK-published events (ICS files) in the site (top-level folder), but you can set up a calendar to pull events by event category. See instructions on the left for more information about event categories.
When previewing a calendar, you see only LINK-published events. To preview an event’s details before publishing, click the “Preview” button in the open event.