Email Form
Building in the WCMS
Overview
Creating an email form in the WCMS involves using the Form Builder to layout the form and then inserting the form into a page with Visual Composer.
The interface for the form builder is different from that of other WCMS elements. The topic “Working in the Form Builder” below explains the user interface. Step-by-step instructions for building a basic form are then presented.
Working with the Form Builder
The form builder has two main areas:
- On the left is a “drop zone” where you specify both the display fields and the behind-the-scenes fields for the form.
- On the right are the buttons for selecting fields (Normal Fields and CDC Reserved Fields) and below the field options is a Settings area.
Add a field to the drop zone by clicking it in the “Normal Fields” or “CDC Reserved Fields” set on the right. Once you add a field, you can edit it by clicking the field in the drop zone and then entering its settings on the right.

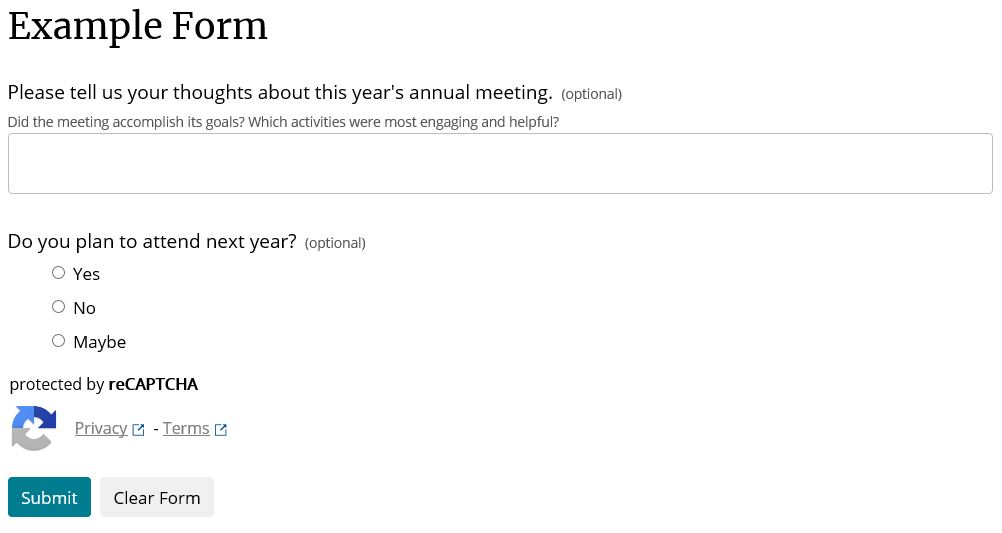
The screen capture above shows the form builder for the example annual meeting form. It shows both behind-the-scenes fields required to make the form behave correctly as well as the two form questions displayed to site visitors (a text field and a radio button).
The question labeled “Please tell us your thoughts about this year’s annual meeting” has been selected. The settings for the question are in the Settings section on the right. Note that you can provide a friendly name for a field (e.g., “this-year” in the example). Friendly labels can be convenient when you are laying out the email that contains the site visitor’s responses. You can also enter help text and indicate whether the question is required.
Building a Basic Form
Enter Required Information
- From the WCMS content browser, click “New Content” and select “Form” when prompted.
- Complete each of the required fields below by clicking the field in the drop zone and then entering its Settings on the right:
- From: This field allows users to enter their email addresses. In Settings you can hide this field, but you should not hide it if you want to send an email to users.
- Refer: URL of page where user is directed after submission. Make certain this page is published before you publish the form.
- Recipient (Rcpt): Email address of form administrator (which is put into hidden field in HTML).
- Template: This is also a required field, but it requires a little setup, so you will complete it in a later step.
Add Display Fields
- Add the fields that will display on the form (click each field from the “Normal Fields” set on right to add to the drop zone). Note that you can reorder fields by dragging them.
- For each display field, click it to display its Settings and edit as necessary. Consider editing each Name field to something you will recognize easily. This will help when you’re laying out the email template. (Note that when you add a field with user-selectable options — such as a radio button — you can also provide friendly names for the options so that the information will be labeled in a friendly fashion in emails.)
Set up Emails
- In the required Template field, lay out the email to the form administrator. (Note that you can copy field names from the gray area below the Settings box.)

- From CDC Reserved Fields, use the Subject, CC, etc. fields to specify the email components.
- If you wish to send an email to the form submitter (e.g., a thank-you email), select the field “Email Visitor” from CDC Reserved Fields. (Use VSubject to specify the subject line for the visitor email and VFrom to specify the reply email address.)
Add to Page
Using Visual Composer, add the form to a page. Don’t forget to test before publishing.
The WCMS form builder has a drag-and-drop interface. To add a field to the drop zone on the left, click the field option in the Normal Fields and CDC Reserved Fields on the right.
To edit a field’s settings, click the field in the drop zone on the left. This displays its properties in the Settings box on the right.
Note that the following fields are required: From, Template, Refer, and Rcpt. For instructions on completing these fields, see “Building a Basic Form” on this page.
The “From” field (for the responder’s email address) is technically required by the form builder, but in the field settings there is a checkbox option for hiding the field on the form.