Installing the Environmental Graphics
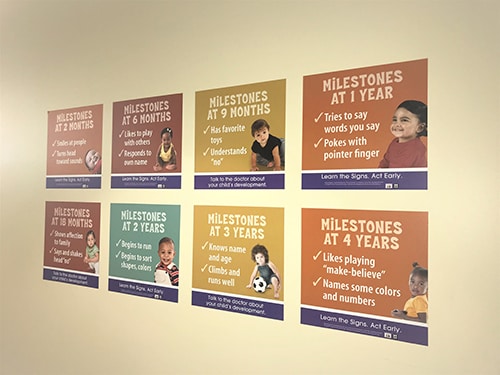
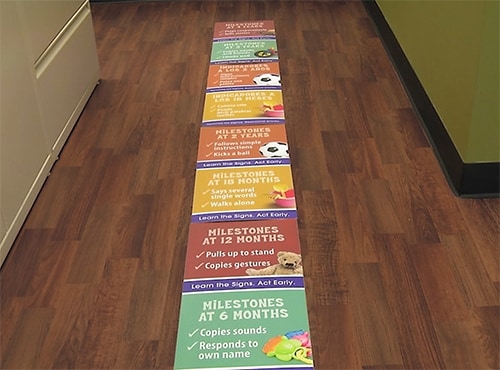
The wall and floor blocks (when produced per the specifications) are designed to fit a variety of spaces and adhere to a variety of surfaces without damaging them.
Tips for Installing the Wall Blocks:

- The wall blocks are best used in sets of two or more, in sequence by age, and in a variety of colors.
- Put them where parents are most likely to see them: waiting areas, behind staff desks, above scales and changing tables, and other highly visible areas.
- Steps for Installation:
-
- Be sure the wall surface is clean and dry.
- Place the wall blocks at or above eye level.
- Measure from a straight edge (the ceiling or corner) to make sure the wall blocks are level.
- Place the blocks about 2 inches apart.
- Placement is easiest if you peel off half the backing, position the wall block, and then peel off the remaining backing.
- Very firmly press the wall blocks in place, particularly along the edges, making sure there are no air bubbles; a credit card or another straight edge tool can help smooth them on.
- Very occasionally, the wall blocks will not adhere to certain painted walls; if this is the case, mounting products may help, or the wall blocks can be placed in a large frame or on a bulletin board.
Tips for Installing the Floor Blocks:

- Floor blocks are best used in an open area in a hall or waiting area. Using the floor blocks as a directional device to lead families from one area to another is ideal (for example, from the waiting area to the certifier’s office).
- The floor blocks can be placed on most clean vinyl or tile floors; however, they do not adhere well to carpet.
- Steps for Installation:
- Be sure the floor surface is clean and dry.
- Start with the small floor block (12 x 12), with an arrow that reads, “Every Child’s Development is a Journey.”
- Add the longer blocks. Use the purple squares as needed to connect the individual blocks and to make the path turn. If you have received curved purple pieces, they can also be used to make the path turn. (The curved purple pieces can also be cut using a straight edge blade for a more customized path.)
- Placement is easiest if you peel off half the backing, position the floor block and then peel off the remaining backing.
- End with the small floor block that reads, “Talk to the doctor about your child’s development.”
- Very firmly press the floor blocks in place, particularly along the edges, making sure there are no air bubbles.
- Floor blocks cannot be reused. If you have to pull them up, you will most likely need to use new floor blocks when replacing.