Collecting and Using Industry and Occupation Data
Use Epi Info 7 to Categorize Industry and Occupation Data using Census Categories
When analyzing public health data sets, we sometimes encounter small sample sizes within certain industries or occupations. If the cell sizes are too small, a meaningful analysis of these variables cannot be done, and we risk the privacy of individuals in the study. Public health datasets also often include too many specific industry and occupation codes for a meaningful analysis without further data processing, especially when data have been collected from community rather than workplace settings. Both issues can be resolved by grouping the data into broader categories to create an analyzable data set.
Have general questions about industry and occupation data analysis? See our Analyze page to learn more.
The following instructions describe how to “recode,” or group, specific Census codes into more general categories of related industries and occupations using CDC’s Epi Info 7 software. The recoded data are stored in new variables whose values are the more general categories.
The Census Bureau uses a convenient, preexisting classification system for combining Census industry and occupation codes into either major (broad) or detailed groups in the Current Population Survey (CPS). This system combines related ranges of codes into
The instructions and program code provided below show you how to create major or detailed CPS industry and occupation categories from Census-coded industry and occupation data using Epi Info 7.
Epi Info 7 can be used to create categories if the data were collected and coded using
- Epi Info 7, and are stored in an Epi Info .prj file, or
- Some other program, in which the data are stored in a CSV, Microsoft Excel, Microsoft Access, SQL, or REDCap data file.
Use the Recode Command in the Classic Analysis Module or the New Variable Gadget in the Visual Dashboard
A recoding function is available in both the Classic and Visual Dashboard analysis modules using the RECODE command.
Industry and occupation codes can be recoded in either module by following the instructions provided in the User Guide and entering the value ranges from the original variable and the recoded values in the table in the dialogue box.
- In the Classic Analysis module, use the RECODE command (Figure 1). Note that you will first have to create the variable that will contain the recoded values using the DEFINE command.
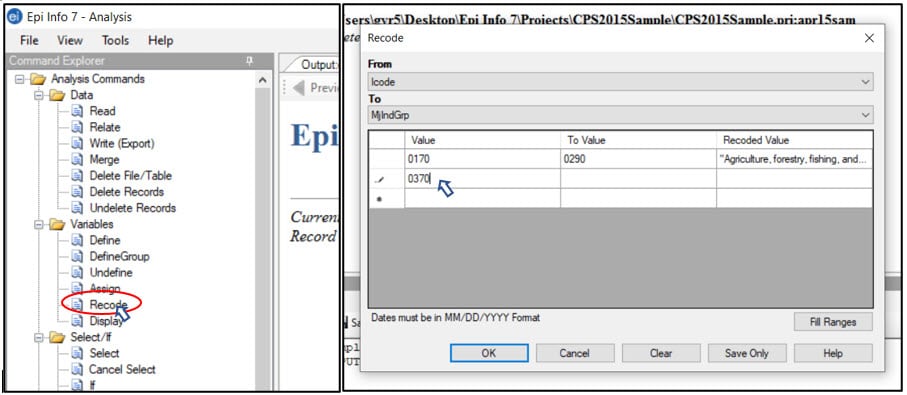
FIGURE 1
- In the Visual Dashboard, use the New Variable Gadget to create a new variable and select “With Recoded Value” (Figure 2). Note that, to use ranges of values to create a recoded variable in the Visual Dashboard, your original variable will have to be numeric.
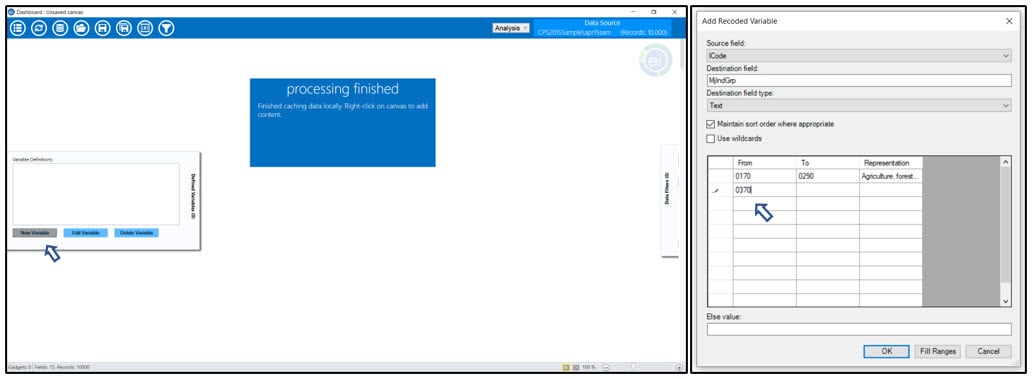
FIGURE 2
Using the Program Editor in the Classic Analysis Module
Both the procedures described above require you to manually enter the original ranges of industry and occupation codes and the recoded values in a dialogue box table, which can be time consuming and a source of error. For complicated recodes—such as creating industry and occupation groups—it is more efficient is to use the Program Editor in the Classic Analysis module.
The following program code can be pasted directly into the Program Editor and run to group Census industry and occupation codes into the CPS major and detailed industry and occupation categories:
Follow these step-by-step instructions for entering and running the program code to create major or detailed industry and occupation categories.
The steps below illustrate where to enter the program code and run the command to create either major or detailed industry and occupation codes. Using an example, we will step through how to recode a sample file that contains Census-coded specific industry and occupation data into major industry and occupation groups.
We will
- Convert the original industry data, contained in the variable “ICode,” into a new variable, “MjIndGrp” (for major industry group)
- Convert the original occupation data, contained in the variable “OCode,” into a new variable, “MjOccGrp” (for major occupation group)
- Open the Epi Info 7 Classic analysis module (Figure 3).
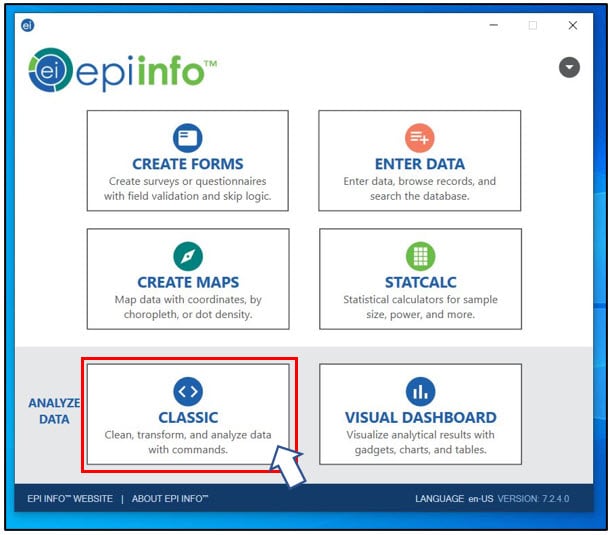
FIGURE 3
- Use the READ command to set the data source. Click on the READ command in the command tree (Figure 4). This will open the READ dialogue box.

FIGURE 4
- Select the database type [1], source [2], and form (or worksheet, table, etc., if your original data file is not an Epi Info project [.prj] file) [3] that contain the data you want to recode, then click “OK” [4] (Figure 5).
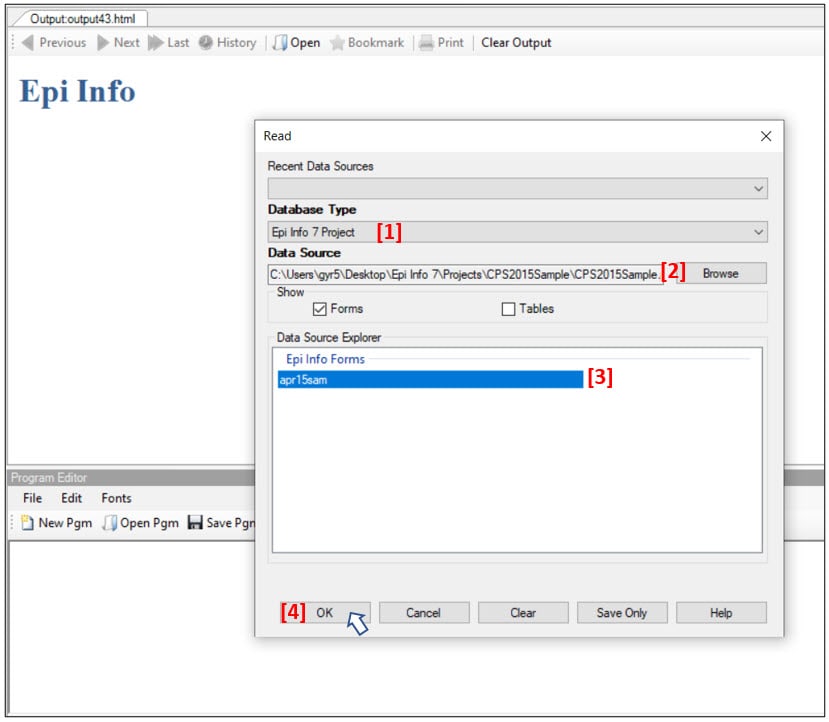
FIGURE 5
- Paste the program code for Major Industry Groups into the Program Editor (Figure 6) (You can find the program code for Census version 2012/2010 industry and occupation codes here or for the version 2017/2018 codes here.)
The DEFINE command in the first line of code creates the new MjIndGrp text variable. The RECODE command that begins on the second line of code assigns recoded values to the variable for each record, based on the original value of the ICode variable.
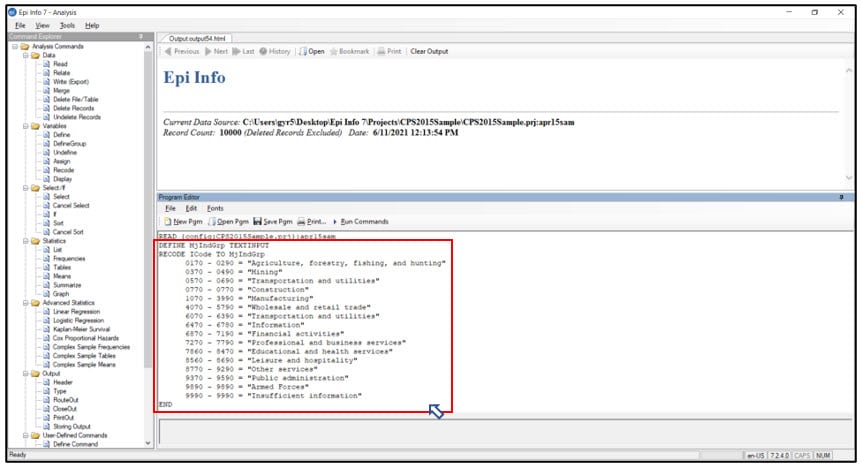
FIGURE 6
- Highlight the new code and click on the Run Commands button (Figure 7). This executes the DEFINE and RECODE commands. When you click the “Run Commands” button, the Program Editor window will be briefly greyed out but, otherwise, you won’t notice anything happen.
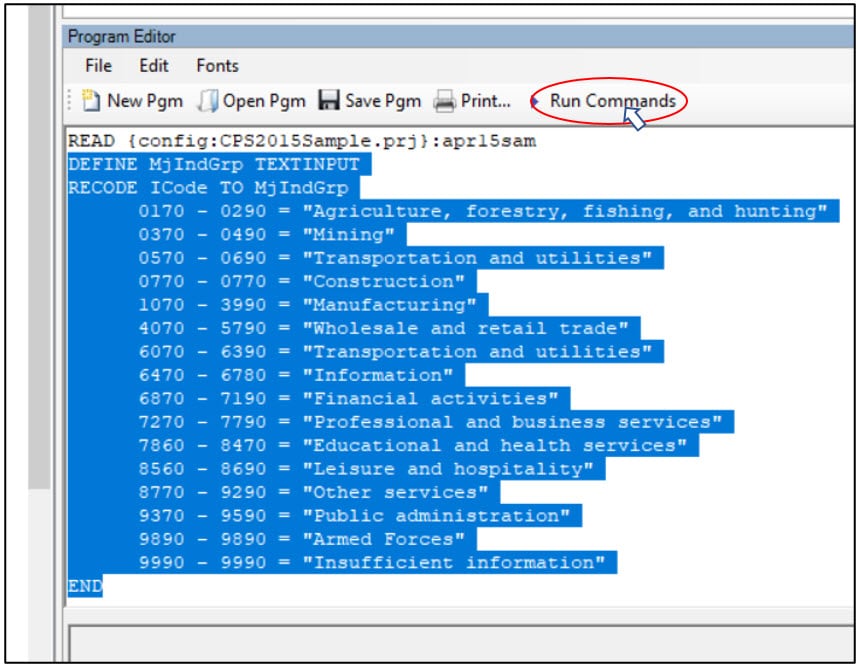
FIGURE 7
- Confirm the recode was successful by running a frequency on the new MjIndGrp variable. Select the FREQUENCIES command from the command tree (Figure 8). This opens the FREQUENCIES dialogue box.
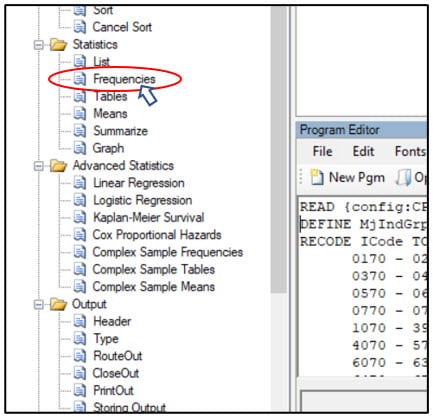
FIGURE 8
Select the MjIndGrp variable from the “Frequency of” dropdown [1], the click “OK” [2] (Figure 9). The results will appear as a table in the Output window (Figure 10).
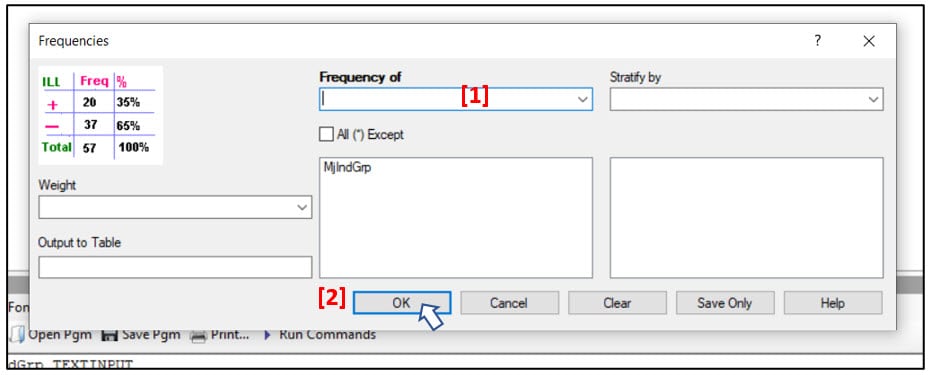
FIGURE 9
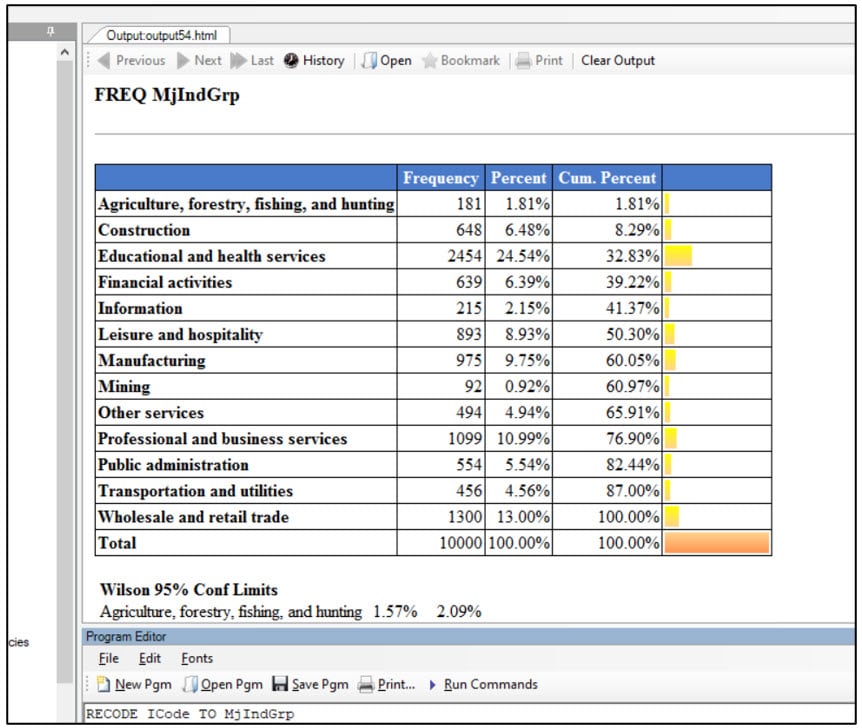
FIGURE 10
- Repeat steps 3 – 6 using the Major Occupational Group code. Paste the Major Occupational Group code, including the DEFINE command, into the Program Editor immediately below the Major Industry Group code, run the commands, and run a frequency of the new variable to confirm it has been created.
- Repeat steps 3 – 6 using the code for Detailed Industry and Occupational Groups, if needed. If your planned analysis calls for more detailed industry and occupational groups, use the program code for creating Detailed Industry and Occupational Group variables instead of, or in addition to, that for the Major Industry and Occupational Groups.
Once you have created the new industry and occupation group variables, they are available for use in subsequent data transformations, analyses, and visualizations. The variables will not be saved after the project has been closed, but the code used to create them can be saved as a program or .prg file in the current project (Figure 11). Saved programs can be opened from within the Program Editor (Figure 12) and run against new data using the Run Commands button (see Figure 7 in step 5 above).
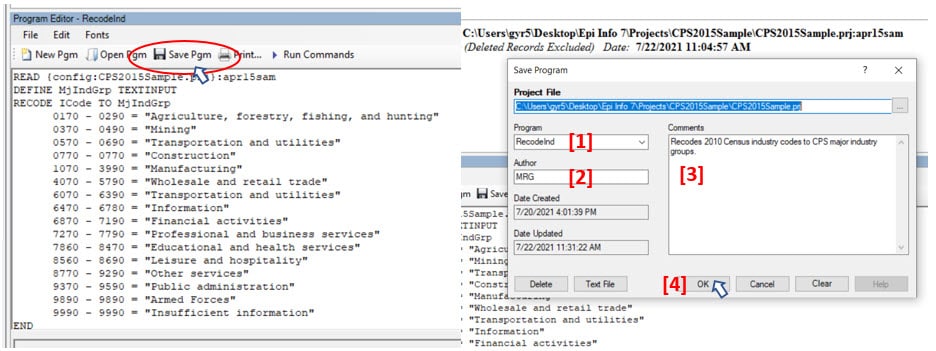
FIGURE 11

FIGURE 12
The full project dataset, including the new Major Industry and Occupation Group variables, can also be exported and saved as a new file in one of several formats, including MS Excel, MS Access, and CSV, using the WRITE command.

